Home › Forums › Cabinet Restoration › On making gold decals
- This topic has 0 replies, 1 voice, and was last updated 2 years, 9 months ago by
 Gary Albach.
-
AuthorPosts
-
February 22, 2023 at 8:54 am #12872
 Gary AlbachForum Participant
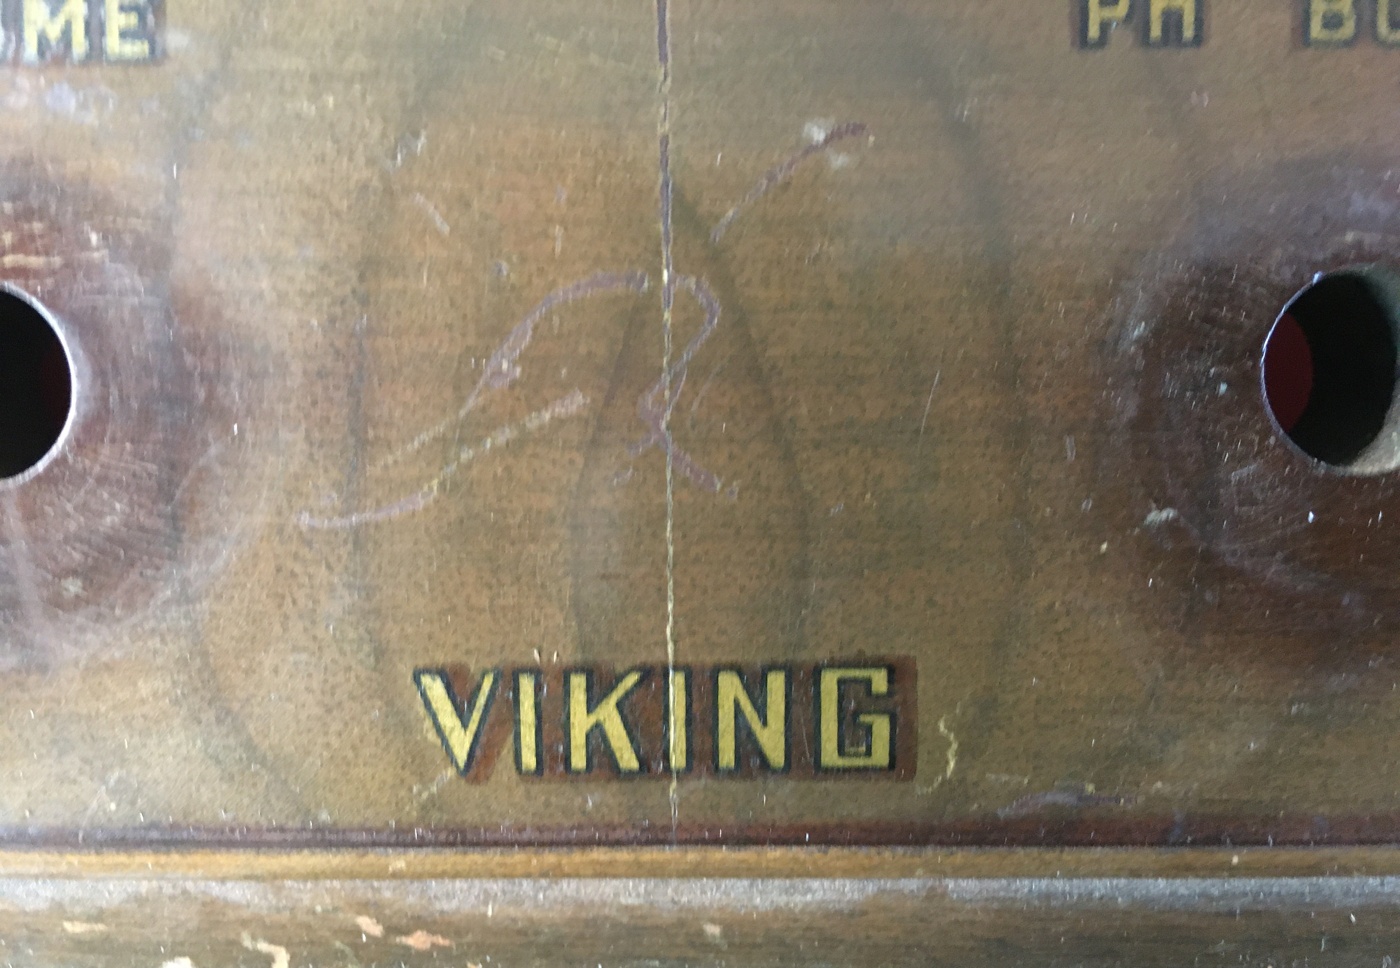
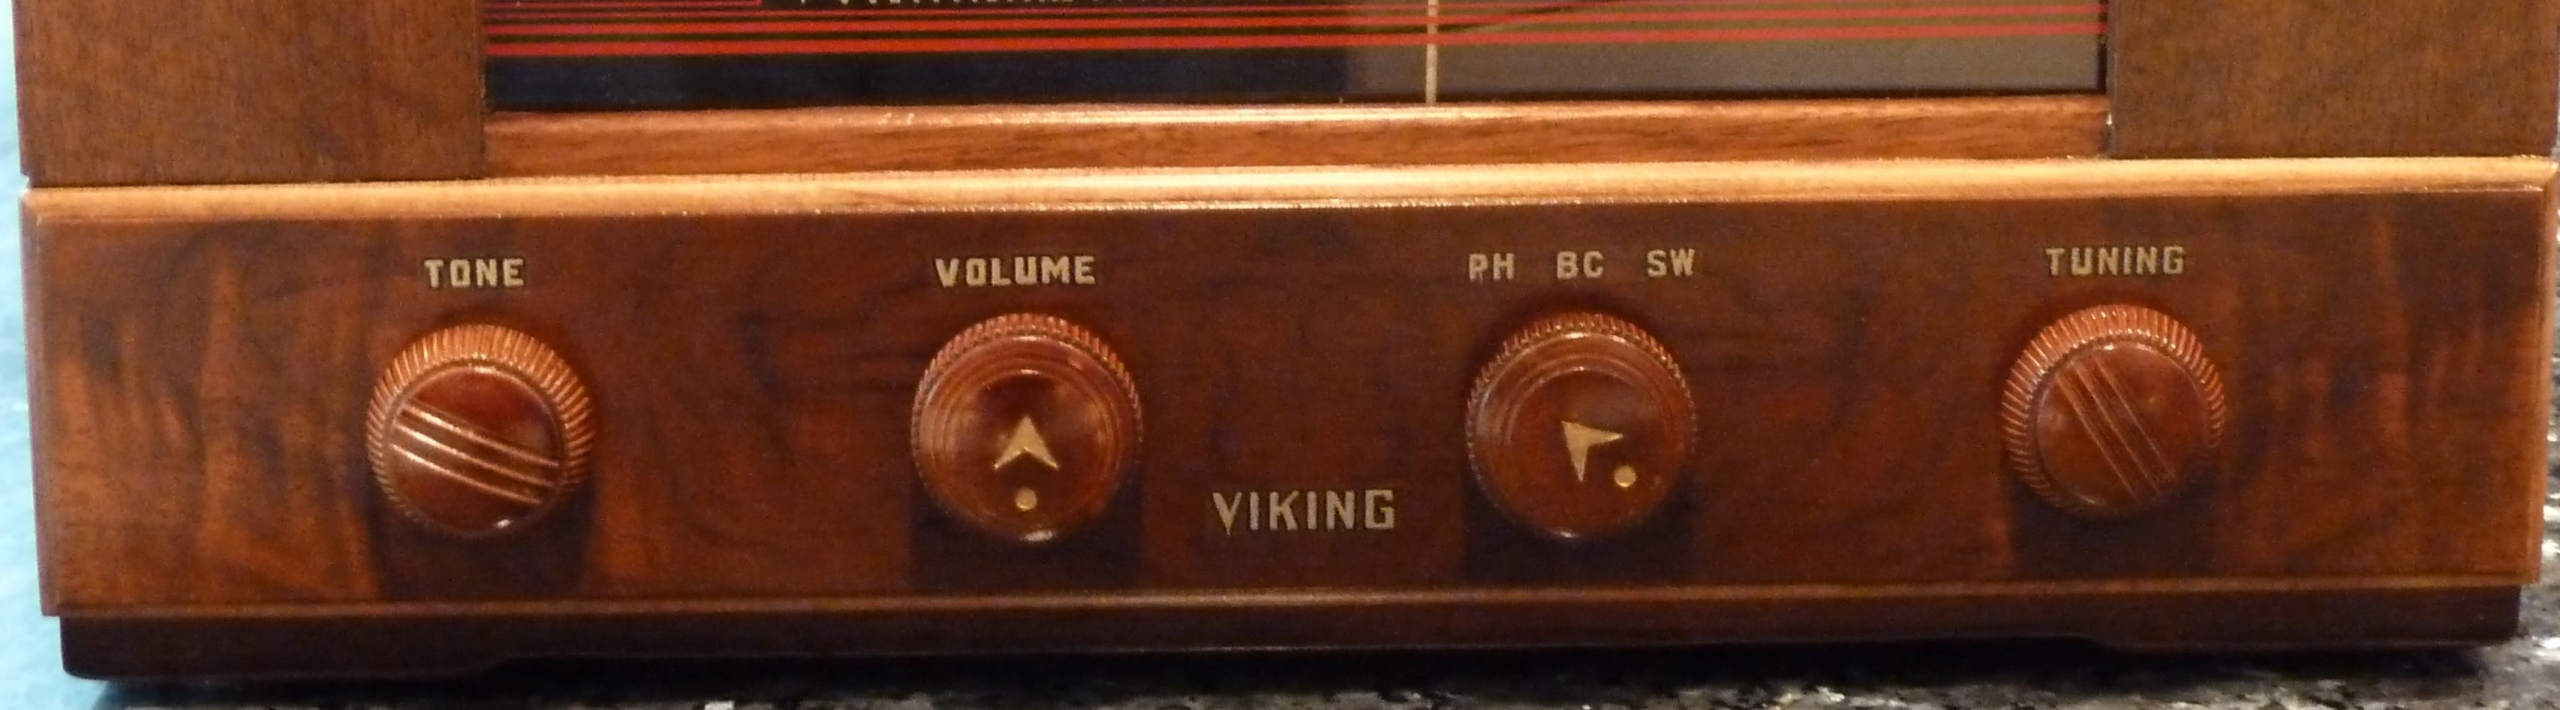
We often need gold or white decals but can’t print them on our inkjet printers. Here’s how I made a set of gold decals for my Electrohome Viking restoration.
Colours printed directly on an inkjet printer are produced by a dithering process which produces translucent letters and lets the background colour show through. When applied to a dark wood background, the inkjet printing can almost disappear. Hence the use of an embossing process.
There’s a lot of information on a Google search for ‘gold embossing’ because it’s a popular technique for the hobby of ‘stamping’. It’s basically very simple: print or draw an image on a surface, cover the wet ink with a fine gold plastic powder, melt the powder particles with a heat gun which fuses them together and attaches them to the surface. The powders come in a wide variety of colours and are available at hobby craft stores.
For my letters, I started with a sheet of waterslide decal paper that I bought on eBay:
https://www.ebay.ca/itm/10-sheets-DIY-Inkjet-Waterslide-Decal-Paper-Clear-Water-Slide-Paper-11-x8-5/302912963275?ssPageName=STRK%3AMEBIDX%3AIT&_trksid=p2057872.m2749.l264I photographed the words on the radio and cleaned up the images using Inkscape, a free drawing program. In hindsight, it would have been easier to simply choose a font that was close to the original letter style. I then printed the words on the shiny side of the decal paper, using black ink in my inexpensive inkjet printer (Epson WF-3520).
Before the ink dried, I sprinkled a fine gold power over the ink and shook the excess back into the bottle. Using my heat gun on a low setting, I gently heated the letters to melt the powder sticking to the ink. The results are gold letters printed on the decal paper. I gently pressed the letters down with a tissue but I’m not sure this is necessary.
I bought my embossing gold powder at Michaels (available here), but there are many other suppliers on the web. Just Google: gold embossing powder.
To achieve the black outline around the letters, I ran the decal paper through the printer a second time, printing a black outline image that I had produced with Inkscape.
Unlike decals made with inkjet colours, these are not water-soluble and hence do not need a protective lacquer overspray before applying them.
The gold particles that are sprinkled over the wet ink tend to stick to the decal sheet between the letters due to a static cling. This can be minimized by first rubbing the decal sheet with a fabric dryer sheet (e.g. ‘Bounce’) before printing with the black ink. The odd stray fused particle can be popped off the sheet with the tip of a hobby knife.
I applied a thin coat of lacquer to the radio and let it dry for a couple days before applying the waterslide decals. I let the decals dry for a day then misted them with four or five thin coats of lacquer. These mist coats helped seal the decal before I applied the final finish to the radio, and also helped melt the edges of the decal into the underlying lacquer. If the edges are still visible, I’ve read on forums dealing with guitar construction that at this stage it helps to wet sand the edges of the decal with very fine wet/dry sandpaper, although I’ve never tried this.
Gary
-
AuthorPosts
- You must be logged in to reply to this topic.